Skip to content

Why Choose a Heat Transfer Film Printer?

Choosing a Heat Transfer Film Printer can change how a shop handles custom apparel and short-run designs. Instead of preparing a separate screen for every variation, operators can print artwork onto film and transfer it with a heat press. This can simplify names, small logos, and multicolor graphics when orders vary. The process also gives teams more control over placement and repeatability, provided settings are tested carefully. Small details matter. Film type, ink compatibility, curing, temperature, pressure, and dwell time all affect the finished result. A crisp print on the film is only part of the job.

For a business considering this equipment, the practical question is not simply whether it prints vivid colors. It is whether its daily output, maintenance needs, and consumable costs fit the work arriving at the door. A cotton T-shirt or stretchy performance garment may respond differently. Test samples before promising durability. Ask suppliers for clear guidance on compatible films, inks, and curing conditions, then record successful settings. Keep in mind that results can vary with fabric coatings, press calibration, and operator technique. No setup is perfect on day one; test prints may reveal adjustments you did not expect. That trade-off matters. A Heat Transfer Film Printer can be a flexible tool, but it is not a shortcut around process control. Understanding its strengths and limits helps buyers choose with confidence—and identify what still needs improvement.
Why Choose a Heat Transfer Film Printer?

What Is a Heat Transfer Film Printer and How Does the DTF Workflow Work?

Why Choose a Heat Transfer Film Printer?

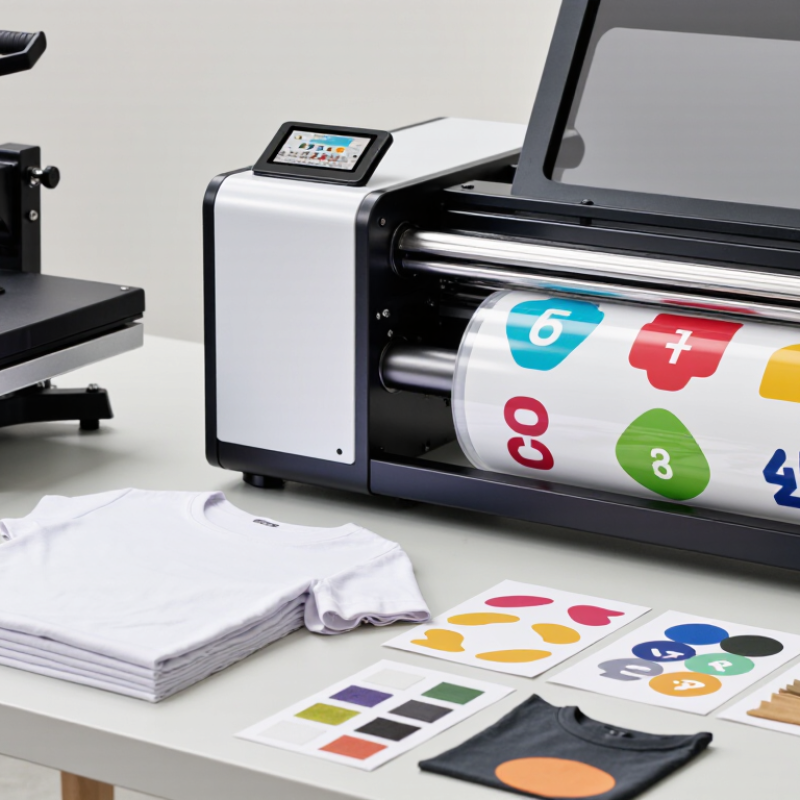
A heat transfer film printer, often used in direct-to-film (DTF) printing, places artwork onto a coated film rather than directly onto fabric. The design is usually prepared in print software, with a white ink layer added beneath the colors so they remain visible on dark garments. Many workflows mirror the artwork before printing, but the correct setting depends on the software and transfer process.

The printed film is still wet when adhesive powder is applied. Excess powder is shaken off, then the adhesive is cured according to the film and ink instructions. The transfer is positioned on a garment and pressed with controlled heat, time, and pressure. Follow the film’s peel guidance; some transfers peel warm, while others need to cool. Small details matter.

A clean edge and even color depend on more than the printer. Humidity, powder coverage, curing, and fabric texture can all affect the result. Cotton, polyester, and blends may respond differently, so test a sample before producing a full batch. A small test print is worth the extra minute. The workflow can feel simple, but it is not foolproof; recording settings helps identify what needs adjustment.

Which Printer Components Support Typical 600–1,200 dpi Output?

A 600–1,200 dpi rating begins at the printhead, but the number alone cannot predict transfer quality. At 600 dpi, the nominal addressable pitch is about 42.3 micrometres; at 1,200 dpi, it is about 21.2. These values are calculated from the stated resolution, not a guarantee of equally fine detail on film. The printhead’s nozzle spacing, firing control, and ink delivery must work together. A blocked nozzle can leave a pale line across a dark logo. Small details matter.

The RIP and driver determine how artwork becomes printable dots, while encoder feedback and media-feed control help place those dots consistently. Heater and platen stability also matter: uneven heat or film tension can soften edges before transfer.

ISO/IEC 24790:2017 provides methods for assessing printed-image quality, including edge and uniformity measures; it is a useful reminder that resolution is only one part of evaluation. Fogra’s ProcessStandard Digital likewise emphasizes controlled production and measurement. I would compare test prints under magnification, then check transferred samples on the actual fabric. A specification sheet cannot reveal every wrinkle.

The awkward bit: a nominal 1,200 dpi setting may look worse than a well-calibrated 600 dpi setup when feed accuracy or ink control is poor.

How Do 75–100 μm PET Films Carry Printed Designs to Fabric?

A 75–100 μm PET film acts as a temporary carrier, not the finished decoration. Its smooth surface holds the printed image in register while the ink and transfer adhesive are prepared. During heat pressing, heat and pressure activate the adhesive, bonding the design to the fabric. The PET film is then peeled away, leaving the design behind. A steady press matters. Uneven pressure can leave a pale edge or a small wrinkle in the print.

This thickness range offers a practical balance: the film is substantial enough to handle, yet flexible enough to follow fabric during pressing. It is not a universal setting; coating, ink, fabric texture, and peel timing all affect results. Textile Exchange’s Materials Market Report 2024 estimates that polyester made up 57% of global fiber production in 2023, making polyester-based materials highly relevant to textile production. That figure describes fiber use, not transfer-film performance. For more reliable testing, ISO 139 specifies textile conditioning at 20 ± 2°C and 65 ± 4% relative humidity. Small details matter. Record press temperature, dwell time, pressure, and peel conditions; otherwise, a successful transfer may be hard to reproduce. A slightly imperfect edge can still reveal where the process needs adjustment.

How Do CMYK+White Inks and Adhesive Powder Build a Transfer Layer?

Why Choose a Heat Transfer Film Printer?

How Do CMYK+White Inks and Adhesive Powder Build a Transfer Layer?

CMYK inks create the colored image, from sharp lettering to soft gradients. White ink adds opacity, helping colors remain visible on dark fabric. Without enough white, a bright red may look muted. Too much can stiffen the print. The right balance depends on the artwork and material.

The printed ink is still wet when adhesive powder is applied. Powder sticks to the inked areas and forms the bonding layer. Excess powder should be removed before curing. Heat melts the remaining particles into a thin, even coating. Small clumps can show up as rough spots later. Curing settings vary, so follow the film and equipment guidance rather than guessing.

During pressing, heat and pressure activate the adhesive and bond the image to the fabric. Peel timing depends on the film; check its instructions. A test swatch helps reveal weak edges, poor opacity, or a hand that feels too stiff. I still check the back of a sample under good light. It is a small step, and easy to skip.

Which Heat-Press Settings Matter: Typically 150–170°C for 10–15 Seconds?

A heat transfer film printer can produce clean, detailed designs, but the press determines how well they bond to fabric. A common starting range is 150–170°C for 10–15 seconds. It is not a universal recipe. Film type, fabric composition, and press condition all affect the result. Check the film’s instructions before setting the machine, especially for peel timing. A cotton shirt may tolerate heat differently from a synthetic blend. Too much heat can leave shine or distort delicate fibers; too little can cause edges to lift after washing.

Small details matter. Pre-press the garment for a few seconds to release moisture and smooth wrinkles. Then position the film and apply even pressure across the design. A press display may not match the platen’s actual surface temperature, so a suitable contact thermometer can help check it. Test a spare fabric piece first. Watch the edges. If they lift, adjust pressure or time in small steps rather than changing everything at once. Let the transfer cool or peel it while warm only as directed. I’d still record each successful setting; fabric batches can behave a little differently.

Why Choose a Heat Transfer Film Printer? - Which Heat-Press Settings Matter: Typically 150–170°C for 10–15 Seconds?

Factor Typical guidance Why it matters
Why use a heat-transfer film printer? It can produce detailed, full-colour transfers for application to compatible textiles. Useful for designs with multiple colours, fine details, or short production runs.
Temperature 150–170°C (302–338°F) is a commonly cited starting range for some transfer films. The correct temperature depends on the film, adhesive, fabric, and transfer process. Follow the film supplier’s instructions.
Press time 10–15 seconds is a typical starting interval for some films. Too little or too much time can affect adhesion or the garment. Use the specified time for the particular transfer.
Pressure Use the pressure level recommended for the transfer; ensure it is even across the design. Uneven pressure can lead to inconsistent bonding. Press settings are not interchangeable across all machines and materials.
Peel method Peel hot, warm, or cold only as directed for the specific film. The carrier-sheet peel requirement varies by product and can affect the finished transfer.
Fabric compatibility Check that both the transfer and garment are suitable for the planned heat and pressure. Heat-sensitive fabrics, coatings, and dyes may be damaged or discoloured by pressing.
Pre-press A brief pre-press may be recommended to remove surface moisture and wrinkles. Follow garment and transfer instructions; pre-press duration and suitability can vary.
Best practice Test the complete process on a spare garment or inconspicuous area before production. A test helps verify adhesion and appearance with the actual film, press, and fabric combination.

Note: The temperature and time ranges above are general starting points, not universal settings. Always prioritize the transfer manufacturer’s instructions and the garment’s care requirements.